You have decided that you want to create a blog. You have even gone so far as figuring out you would like to use Gatsby to power the blog. The next step is to actually figure out how to set up the blog. But how to go about it? In this post I will go through the steps I took to create this blog using Gatsby’s blog starter.
Making a choice
When researching how to set up a blog with Gatsby I found two ways to go about it:
- Make use of Gatsby’s blog starter
- Make use of the Gatsby Starter Blog Theme
I initially went with the starter blog theme, but after fiddling around with it for some time I decided that the starter was better suited for me.
One nice thing about the starter blog theme is that a lot of things are hidden away, so you only have to deal with specifics when you need it. However, I found that I like to have all the building blocks of my blog in the main project and not hidden away in js packages.
Most documentation and questions also seem to be related to situations where a theme hasn’t been used, so even though my project directory now is more cluttered I do think it will be easier for me to solve issues in the future by not using the theme.
Getting started
The easiest way to get started with Gatsby is to install the Gatsby cli:
npm install -g gatsby-cliAfter that is done, you set up your blog by running the following commands:
gatsby new my-private-blog https://github.com/gatsbyjs/gatsby-starter-blog
cd my-private-blog
gatsby develop
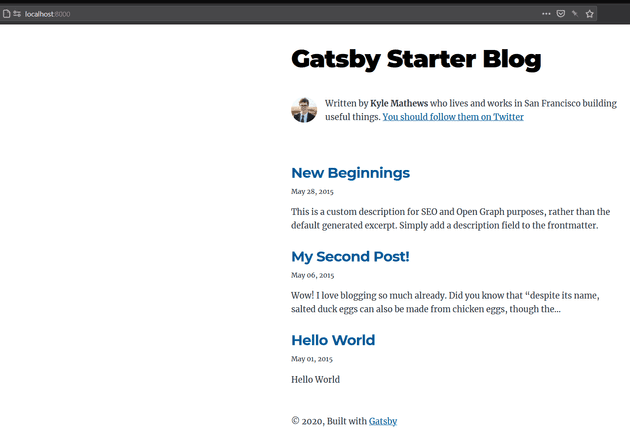
You now have your blog running locally on your machine. Just go to localhost:8000 and take a look:
This of course is not super personal, so you do need to make a couple of changes to make it your blog.
Fixing the metadata
The first thing to change is the metadata in gatsby-config.js in the root directory.
The values here are accessible throughout your blog,
so this is a good place to add information you might need in multiple places.
For this blog I used the following metadata values:
siteMetadata: {
    title: `Simon Says Code!`,
    author: {
      name: `Simon T. Clement`,
      summary: `a Danish software Developer sitting in Finland thinking about code.`,
    },
    social: {
      twitter: `Mr_STC`,
      linkedin: `simontc`
    },
    description: `A blog about software development`,
}titleis well, the title. This is the value used to control what is shown as the name of your blog.descriptionis used for SEO but is not used anywhere else currently.authorandsocialare used to create the author bio which is included on the blog front page and in the footer of each blog post.
You can see how author and social are being used in src/components/bio.js where information about the author and twitter handle is being queried:
query BioQuery {
  avatar: file(absolutePath: { regex: "/avatar.png/" }) {
    childImageSharp {
      fixed(width: 50, height: 50, quality: 95) {
        ...GatsbyImageSharpFixed
      }
    }
  }
  site {
    siteMetadata {
      author {
        name
        summary
      }
      social {
        twitter
      }
    }
  }
}
Filling out the metadata might end up being one of the harder parts of creating your blog. You have to come up with a name for the blog after all…
Putting a nice face on it
With the metadata updated, you can move on to make the world know what you look like.
By default, your avatar is a picture of some guy. Unless that actually is you, you probably want to change it.
This is done by replacing content/assets/profile-pic.jpg with an image of your choice.
Note that if you change the name or extension of the picture you also need to edit the GraphQL query in src/components/bio.js.
In my case I changed it, so the avatar query now looks like this:
[...]
query BioQuery {
  avatar: file(absolutePath: { regex: "/avatar.png/" }) {
    childImageSharp {
      fixed(width: 50, height: 50, quality: 95) {
        ...GatsbyImageSharpFixed
      }
    }
  }
[...]
Changing your bio text
If you would like to change the text shown in the bio, that is also done in bio.js.
More specifically near the bottom of the file where the default text is defined:
<p>
  Written by <strong>{author.name}</strong> {author?.summary || null}
  {` `}
  <a href={`https://twitter.com/${social?.twitter || ``}`}>
    You should follow them on Twitter
  </a>
</p>
Here you can also see how the data from the GraphQl query is being used to populate your bio text.
Since I’d like to include my LinkedIn account in the bio I updated the query:
[...]
site {
    siteMetadata {
      author {
        name
        summary
      }
      social {
        twitter
        linkedin
      }
    }
  }
[...]
With the data queried I can access it in bio text:
<p>
  Written by <strong>{author.name}</strong>, {author?.summary || null}
  {` `}
  You should follow him on
  {` `}
  <a href={`https://twitter.com/${social.twitter}`}>Twitter</a>
  {` `}
  or connect with him on
  {` `}
  <a href={`https://www.linkedin.com/in/${social.linkedin}`}>LinkedIn</a>.
</p>
Actually writing something
Now the blog looks like you own it and are the one writing it, but you actually haven’t written anything yet. That is luckily also very easy to remedy.
First, delete the folders and files in content/blog to get rid of the sample posts.
Now you have a couple of choices to make regarding how to store your posts.
The easiest thing to do is just creating a .md file in content/blog and begin writing.
I do think it makes more sense to create a folder for each post though.
This way you also can save images and other things you want to store with the post and keep it all together.
As an example, the full local path to my first post is content/blog/hello-internet/index.md.
Behind the scenes, Gatsby has been set up to use the name of the parent folder instead of the name of the actual file.
There is a drawback to this though: The url of the blog post will be the same as the path to the parent folder.
That means that if you would like to add a date to the folders for better sorting, that date will also be included in the url which might not be what you want.
As an example, a post stored locally as content/blog/2020-10-20 Hello Internet/index.md will be accessible through the path /2020-10-20 Hello Internet on your blog.
I don’t like this approach, since I would like to be able to prepend dates to the local titles without it having any influence on the path on the blog.
For now, I’m using a web-friendly format without any dates for the naming of folders such as hello-internet.
However, it is possible to change how the paths are generated for blog posts. I will look into that and write about it later.
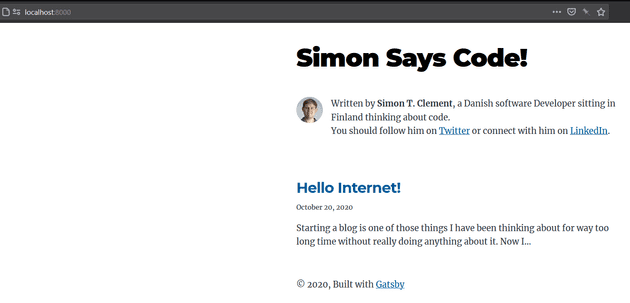
The result
With these initial changes the blog now looks slightly better:

The blog is of course still running locally on the computer. It would be very nice to change that.
In the next blog post, I will go through the steps I used to set up my blog for free with DigitalOcean’s new App Platform. It is all quite simple until you want it to be hosted on your main domain. Then it gets a bit more interesting…
